Sunday 30 October 2011

Now I've got the cuttle bug!!

Guess what I got for my birthday? A Cuttlebug embossing and die-cutting machine! So now I'm off on a new creative tack, and I've definitely got the 'cuttle bug' big time!!

Over the past few months I've noticed quite a few quillers producing some beautiful work on embossed backgrounds, so now I'm trying it for myself.


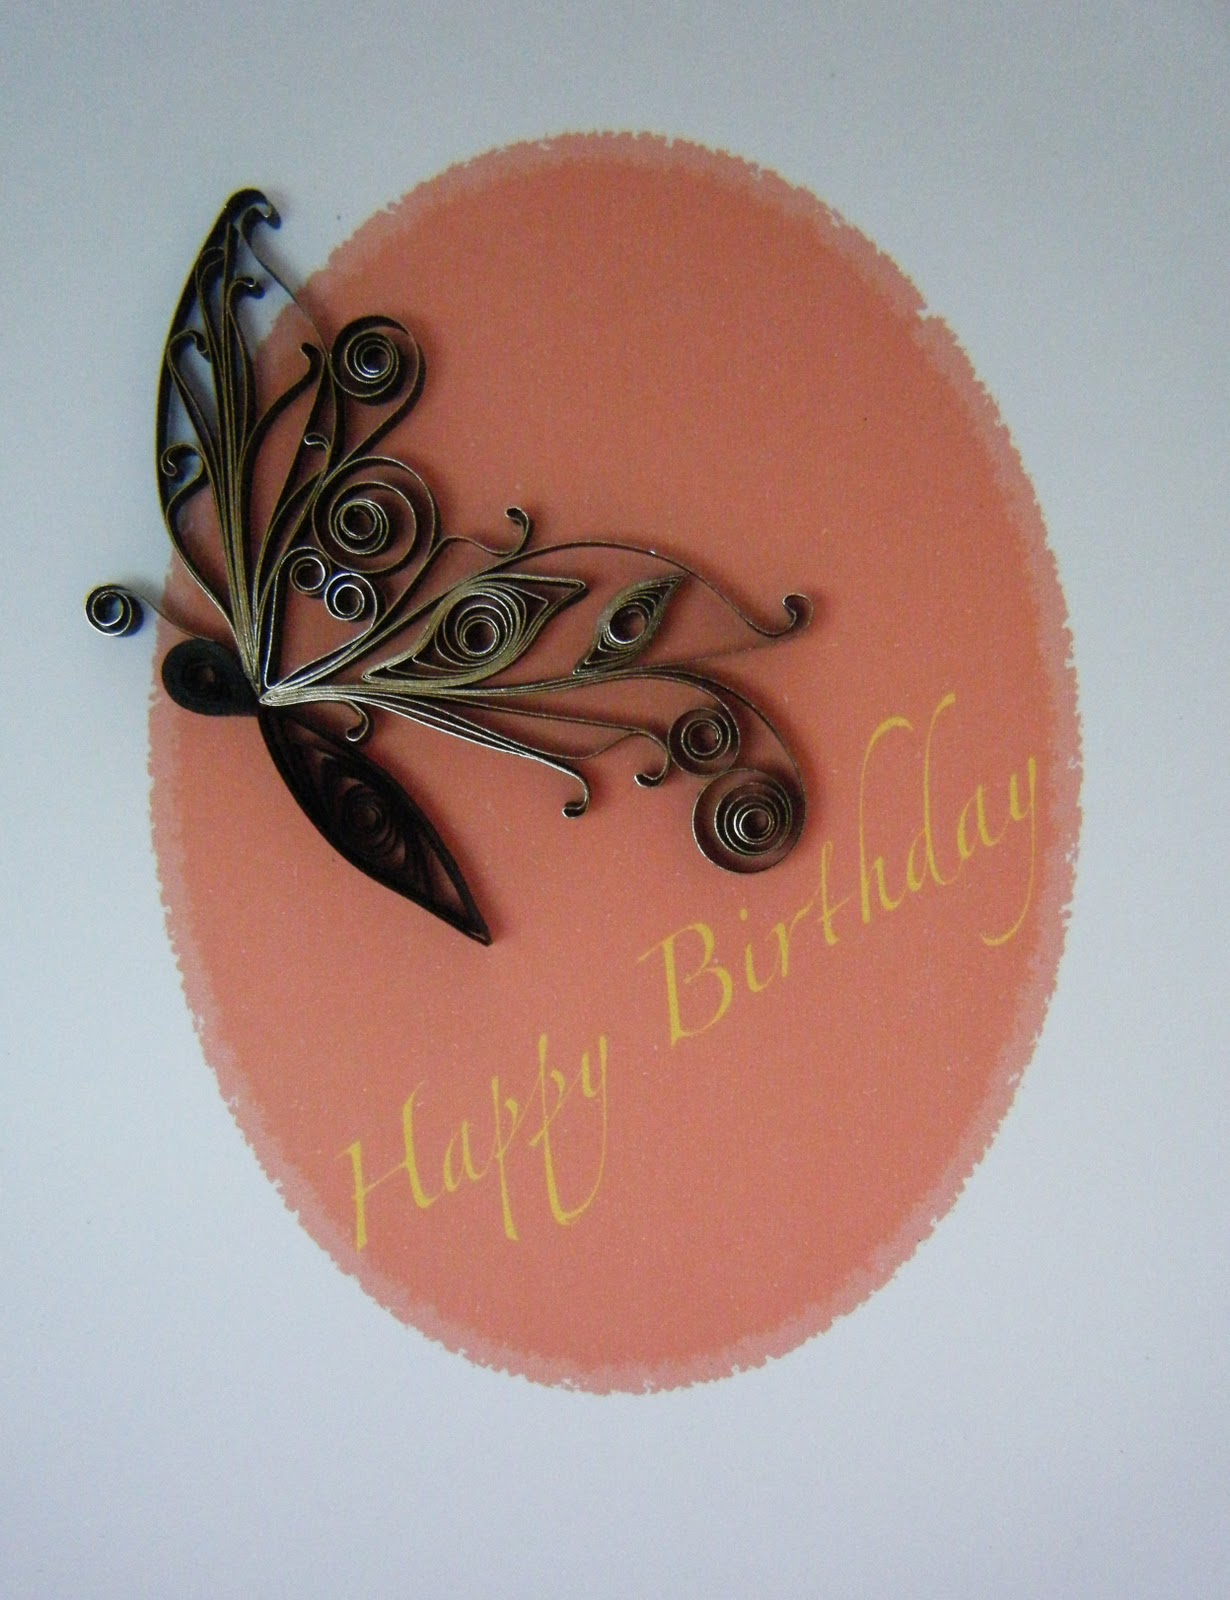
Here's my first attempt: an embossed butterfly on an oval cut-out, complemented by some quilling and mounted on a card with an embossed edge pattern. Once I'd processed the butterfly shape in the Cuttlebug, I found it quite easy to colour it in using brush marker pens. I decided to quill the flower using 1.5mm strips for two reasons: firstly to complement the delicacy of the embossed side pattern, and secondly to restrict the overall thickness of the finished card since I'd already had to glue on the cut-out oval as an extra layer. (Here in the UK, we have to pay more in postal charges if a card is more than 5mm thick, so every extra millimetre counts!) The vertical purple line is a 3mm quilling strip.


For the second card, I embossed a cut-out oval with a different pattern, coloured it very roughly with a few strokes of a brush marker (just to catch the raised sections) and attached it to a printed card base. The quilling was again done with 1.5mm strips. I have a friend who ONLY quills in this width, and every time I see her work I am struck by the beauty and delicacy of the motifs she creates. It makes 3mm work appear quite chunky in comparison.

Here's a close-up of the quilling on the embossed background. I think I am going to have fun with this ...

Sunday 23 October 2011

Update on earrings ... and a couple of new cards

Another week has gone by, and what do I have to show for it?

Well, I've started making earrings again, in an effort to stock up for Christmas. These two designs both incorporate two-colour huskings embellished with folded roses:

I'm pleased to say that my friend Doris was delighted with the silver and yellow vortex earrings that I made for her - here she is modelling them!

And I have managed a couple of new card designs, too. The first of these features a photo taken at a beautiful lake close to my home in Hampshire, embellished by a quilled dragonfly whose wings were quilled with holographic edged strips to make them sparkle.

The second is a floral design which utilises a printed digital 'mat' that's on offer as a freebie with this month's Papers and Pixels magazine. The 'mat' is actually a photo mask that can be used in digital scrapbooking designs, but I thought I'd have a go at echoing the shape of some of the leaves and flowers around the edge in quilling.

I'm also working on some new ideas for quilled leaves in readiness for The Sweet Leaves Blog Hop on 4th November (see panel at the top of the column opposite) - but, of course, I can't reveal these yet!

So today's post is a bit of a 'mixed bag' to be honest ... but at least I have a few new things to share!

Wednesday 19 October 2011

Victory for quilling ... an update

Yesterday I attended the Autumn Council Meeting of the Hampshire County Federation of Women's Institutes (HCFWI) where I received an award certificate in respect of my quilled pin brooch which had been selected as one of four entries to represent Hampshire in the 2011 Inter-Counties Craft Competition for jewellery. (The other selected entries were made using beading and silversmithing techniques, so it was great to see quilling represented for the very first time!) Collectively, these four entries went on to achieve the highest score in the competition final, making Hampshire the overall winner. One of the Hampshire judges said that I had "stunned" them with my entry, adding "who would believe rolled paper could be used in this way?" I'm hoping this will help to raise the profile of quilling amongst WI members, and I already have two enquiries about bookings for demonstrations, so this is very good news indeed!!


Here's a photo of the four entries that were chosen to represent Hampshire, all on display yesterday at The Anvil theatre in Basingstoke. You can see my little pin brooch in the centre. I was so pleased that quilling had earned its place alongside such superb examples of the better-known arts of silversmithing and beading.


I had used black strips edged with gold to create my pin brooch, which you can see in more detail here against the backdrop of my award certificate. Many people asked me about the materials I used, and found it hard to believe that the piece had actually been made from paper and not rolled gold!


Yesterday's meeting filled the theatre in Basingstoke, and a huge cheer went up from my WI colleagues when my name was announced. Above the stage there was an overhead projection screen where the names of the four Hampshire winners were displayed. Alongside the names was a single photograph of one of the entries ... and I'm very proud to say that it was mine!

Thursday 13 October 2011

Vortex coil earrings


Word seems to be spreading about my quilled jewellery ... and I'm getting all sorts of requests, ranging from "Can you replace the clasp on this necklace?" to "Can you make something like this in quilling?"

Well, I always like to help if I can. So, when a friend asked me recently if I could re-create an earring design like the one below using quilling strips, I was happy to try and rise to the challenge.


The original piece was made from metal, with bright yellow enamelling. I decided to reproduce the diamond shape for each earring using vortex coils created from pairs of yellow strips (one crimped, one not) to make a fairly solid background.  Having bordered both diamonds with silver strips, I created each of the silver chevrons from two marquise shapes which I had made using crimped yellow strips edged with holographic silver for an extra sparkly effect. These, again, were bordered with silver. To strengthen the pieces, I applied PVA glue around the sides and all over the back of both earrings before attaching metal posts and varnishing, as I wanted to be sure that the centres of the vortexes would not push out when taking the earrings on and off. Here's the end result:


Sunday 9 October 2011

Life gets in the way!

No post here for nearly a week ... well, that's the way it goes I guess - there's never a shortage of crafting ideas in my head, but life has an annoying habit of getting in the way just when I want to put them into action!

In actual fact, I haven't been entirely idle on the quilling front these past few days. I DID manage to create another card design using some more of those metallic-edged strips I love so much. I have some gorgeous purple 3mm strips which are edged with copper, and decided they would look great on a background of even deeper purple, complemented by some extra yellow swirls to add a little brightness.

I also played around with fringing some strips, using the very useful 14cm wide 'bulldog clip' that I bought at The Quilling Guild's wonderful event last month. I managed to create three fringed flowers using some iris-folding strips which I had folded in half and fringed diagonally inwards from the folded edge, holding the open edges together inside the clip as I cut. When you roll up this type of fringed strip around a central solid coil, the cuts splay naturally outwards to create an interesting petal effect - although I did find that it's best to glue the open edges together after fringing and apply a little downward pressure to open the cuts up first.

Here are the flowers I made, alongside my finished card. I'm hoping to get a LOT more quilling done this coming week, if I get the chance!


Monday 3 October 2011

A gilded butterfly

I've been experimenting with metallic-edged quilling strips again. The wings of this new butterfly are made from 3mm black strips edged with gold - the effect reminds me a little of gilded wrought iron work. To be honest, these wings evolved 'by accident' as I played around with making asymmetric huskings between my fingers and twisted the end loops (still one of my all-time favourite current techniques!)  I put two of the huskings together, added a few extra marquises and swirls - and my mind just said "butterfly"!! So here's my latest butterfly on a card for the market ... who knows what new ideas tomorrow may bring?


LinkWithin

Related Posts with Thumbnails